**I’ll be updating my site and moving it to a new format soon. The site layout I selected isn’t being supported for phone browsing. The content is there, but formatting may be a bit off sometimes. I’m sorry for any annoyance!**
I took pictures throughout the “Felicity” project. I’ll share some of the body construction, head sculpt, and clothing pictures in the next 3 posts.
This post will focus on making the doll’s cloth body. I wanted to keep the vintage look of a cloth body, but I wanted her to be more rigid and poseable like a jointed composition, vinyl, or resin doll. Felicity is jointed at the neck, shoulders, elbows, wrists, hips, and knees.
Patterns from my last doll have been modified so I can try a different joint design.

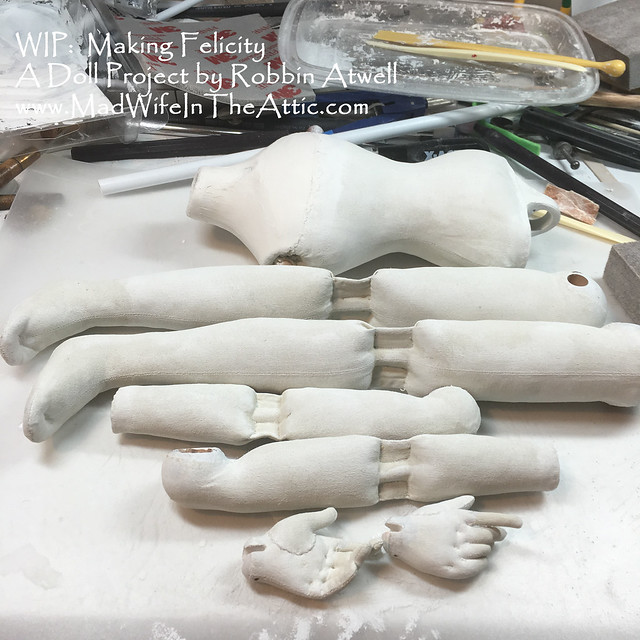
I used a lot of hardware store finds (PVC, dowels, tubing…) to make her interior armature. I kept detailed notes, because once she’s sewn up, I won’t remember what I did!

The arm contains tubing, wire, and wooden balls to allow for the shoulder, elbows, and wrists to pose.

Torso and leg:

Bottom of torso – legs will attach here.

These wooden balls will be glued to the tubes and be the armatures for the thighs.

Checking proportions.

Gesso and sand the stuffed parts.
The top of the torso is clay. Gluing fabric over it makes it match the head.

Paint and assemble the body.

I’ll be showing photos of sculpting the head in the next post.

So fun to see how you put it all together. Your creativity knows no bounds, You are an artist!