Annora Monet is a 16″ ball jointed resin fashion doll. She is one of the premier offerings of Robert Tonner’s new enterprise where he collaborates with the most talented designers and uses cutting edge technology to make “an assortment of figures ranging in personality and style from the eccentric to the sublime.” http://www.phynandaero.com/
Annora Monet is available with several costume and face paint options. My customer Dorene, envisioned Annora Monet as a delicate 18th century beauty so we started with the blank version. Dorene will sew a period wardrobe for her.
I took photos as the face painting and wig construction progressed, so I’ll share them here. Perhaps they’ll help you with a future project.

Step 1
Step 1: I’ve cleaned up the inside eye wells, just making sure the resin is nice and smooth. Before painting, I also make sure the well for the eye is large enough to accommodate the eyeball, and remove any seam lines (Annora didn’t need this). This is the time to study the sculpt for any asymmetry or quirks that need to be considered when painting. Annora is a very symmetrical sculpt–no issues here. She was washed to remove any lingering mold release and she has a good coat of Zoukei-mura UV cut spray. I like to use Zoukei-mura sealant on translucent resins.

Step 2
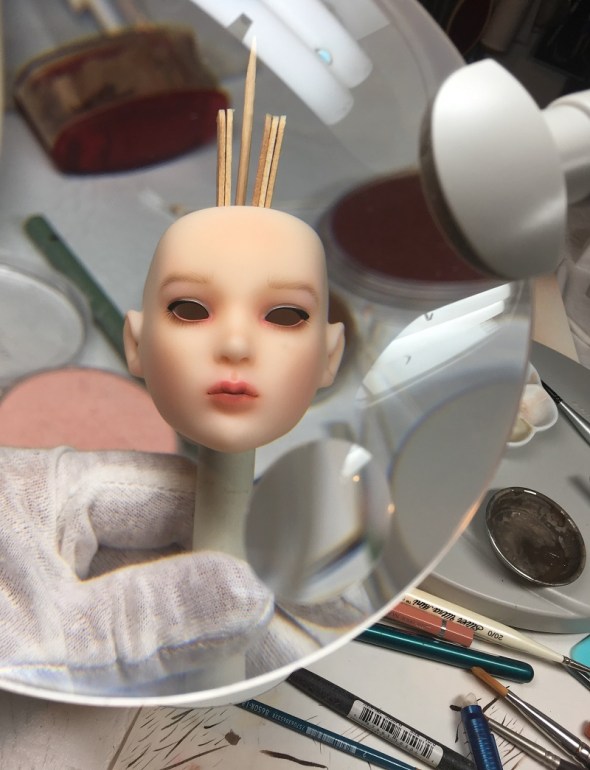
Step 2: This is the first layer of color. I used raw umber paint for the upper eye liner and mixed a light salmon to line the lower lid (Golden acrylics). I generously apply paint around the eyes because the eyes get fussed with a lot when inserting the eyes and gluing the lashes–those surfaces need to be resilient. I based the shape of the liner (wider at the outer eye) on Robert Tonner’s drawings of Annora.
I use watercolors, pastels, and pencils for most of the rest of the face. She now has a light shading on her lips, cheeks, and around her eyes. She’ll get sprayed to seal the work at this point, then I’ll apply the next layer of color. Note that once she is sprayed with sealant, these colors cannot be removed.

Step 3
Step 3: I’ve added more color to each feature. The base of the brows is sketched in with pastel to establish their position. I’ve painted the crease in the eyelid and shaded around the eyes with pastel and pencil. I’ve added more blush on the cheeks and more color and shaping of the lips with pastel. Pastels are applied by sort of scrubbing them in with a brush or rolled paper stump. Layering in this way creates the look that is characteristic of BJDs.

Step 4
Step 4: Now she’s developing her personality. In this step, I’ve painted the lower lashes and the first layer of brow hairs. There will be additional shading and brow hairs added in later steps. The lips are shaded in more with pencils and pastels. Much of the lip color is applied with sharp pencils in vertical lines then smoothed with a stump. This creates the characteristic lip lines BJDs often have. In each step, I shade and tweak all areas of the head: cheeks, ears, forehead, etc.
 Each “step” is what I do between each coat of spray. Once I spray, the work is locked in and can’t be changed. Scary! But, that also means I can paint the next layer without goofing up what I’ve already done. That’s really important when I start working on the lashes and brows. I’ll often repaint them a dozen (or more) times before getting them right. I use watercolor paint, so I can wipe them away repeatedly.

- Step 5
Step 5: In this step, I’ve filled in the eyebrows. Brows are the most difficult feature for most face painters. Eyebrows determine the attitude and personality. I do best when I build them bit by bit in each step. They started as a line, then I added hairs, then shading, then more hairs. Finally, I add a few strokes of light paint. I also painted a very fine highlight above each eye. I think the highlights give the face a spark of life.

Step 6
Step 6: I glossed the lips and around the eyes with Golden acrylic gloss medium. Next, I’ll glue on the upper lashes, and insert her eyes.

Introducing: Annora Monet
This is Annora Monet completed. In the next post, I’ll share some of the wig making process.
Here are more pictures of her:


