
Many people dye BJDs to get a special coloration that’s not offered in the normal doll line, to camouflage flaws, or to make heads and bodies that are different resin colors match.
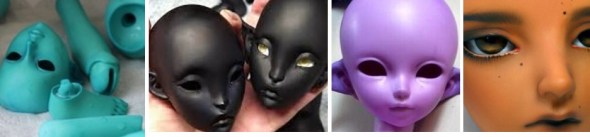
Images from the web to give you an idea of the variety of effects that can be achieved with dye.
The great advantage to dyeing over simply painting the entire doll is that the dye doesn’t rub away at the joints so you can play, dress and pose the doll freely.
I found it to be a very stressful process. Basically, you take a cute little doll, dip it piece-by -piece into a simmering cauldron of foul smelling, muddy colored brew, and hope for a beautiful result. Yikes!!!
If you’d like to dye some resin, check out lots of YouTube videos, and this Facebook group is excellent: BJD Dyeing Group on FaceBook
I learned a lot from the FB group: methods definitely, but most importantly, what to do when things go wrong (and they did). Also, what are reasonable expectations. Most BJD dyers aren’t looking for a perfect, entirely consistent coloring from part to part. They’re happy with a color they like, mostly consistent, that looks good with some blushing and tweaking.
I didn’t take enough pictures of the process. It wasn’t going well much of the time so I didn’t take time for pictures. I don’t think I’ll try dyeing again, but I think others might learn from my experience.
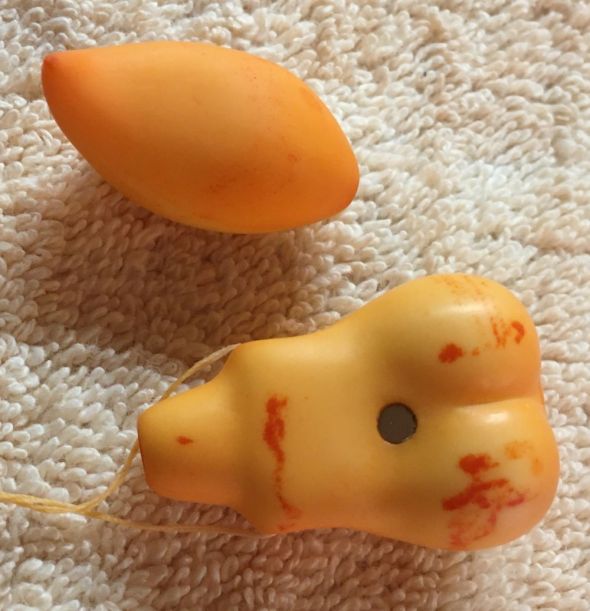
The doll is a tiny 11 centimeters. It is a “Cute Baby Fox” by Estartek. The jointing is simpler than most BJDs, so a good beginner project.

I’m dyeing this critter for my friend who likes foxes and orange. So it will be very orange.
I used IDye Poly in Orange. I considered mixing colors or going for a gradient effect, but decided that as a beginner, I’d keep it simple and no fancy stuff. I used about half of the dye packet and I added the packet of color intensifier to a large pot. There is a lot of experimentation in this process. I could have gone back and added more dye or added more water to dilute.

There are other products that work well for dyeing resin, but the critical thing is to use a dye that is intended for plastics and synthetics.
I prepared the doll by disassembling and washing it well. This is a new doll so there are no paint or sealant to remove but there might be mold release.
I strung most of the pieces but a few attached to the body only with magnets. I used some soft nylon netting to make a bag to hold those. Each piece will be individually dipped into the simmering dye pot.

I already owned a large dye pot that I use for cloth and wig fiber. It is important to use a stainless steel or enamel pot that you won’t ever use for food. You’ll also need a dedicated stirrer.
Protect all your surfaces with plastic and towels–this stuff gets around no matter how careful you are.
I stirred gently and brought the pot to a light boil then cut the heat back to a simmer. I tested the dye strength by dipping in strips of paper. I began dipping in the doll pieces individually by holding the string above the pot.
My results were terrible. The ears came out nice, but not the rest — and the torso was really awful.
I went to the FaceBook Bjd Dyeing group to look for reasons for these abysmal results. Old sanding, sealant, and modifications are often the reason for very uneven dye, but those aren’t issues here since the doll is new. I’m still not completely certain why the results were so so so bad but some possibilities are:
- An icky foamy stuff forms on the surface of the pot. The resin might grab the pigment in that foam as it enters the water.
- The dye isn’t mixed well enough, or has settled, or separated.
- The resin got too close to the bottom of the pot which was very hot–maybe dye settled to the bottom, and the denser hotter dye was more reactive.
- The strings touched the body parts as they dangled in the big pot and the areas that the strings touched took the dye more intensely << the winner!!! I think this is the major issue.
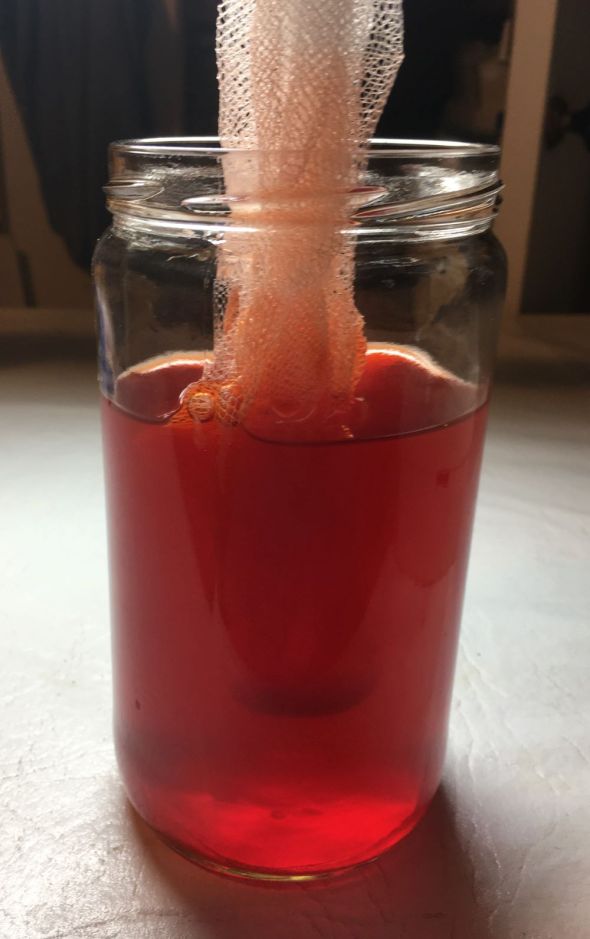
Now, I had to get the bad dye out. You can soak the parts in acetone and the dye will leave the resin (it’s like magic). Like most BJD enthusiasts, I avoid acetone totally. But it worked – mostly. It removed all but the faintest shadows of the unwanted dye. You can see that the acetone turned orange from the dye it extracted.

If acetone + resin doesn’t scare you, it should. Many people have seriously damaged their dolls by soaking in acetone. I dipped each piece briefly until most of the dye disappeared—about 10 seconds for these tiny parts. The acetone softens the resin so handle it carefully. Rinse it and let it rest overnight and it will harden back up.
One piece did get damaged in the acetone bath ☹
The arms have a very tiny bar of resin that hold the elastic string. It just dissolved. The next day when I was sure that the resin was firm, I drilled tiny holes with a pin vise. I inserted cut off straight pins. It was a perfect fix and will be more durable in the long run. Definitely a reminder that acetone can damage thin resin.
2nd Time in the Dye Bath
This time around I heated the dye pot, stirred it really well, then ladled out some dye water into a large mouth glass jar. This way I can see what’s happening in there. There’s no foamy stuff on the surface. I’m not using strings this time. Every piece will be dyed individually using the nylon net bag because the pieces I did that way came out best the first time. I haven’t seen other people use this method, but it worked great for me. After each piece, I ladled in more dye from the pot if necessary and microwaved the jar of dye for 40 – 60 seconds to keep it really hot, and stirred.
If a piece was too light, it got another dip.

This time, it went well. Hallelujah!!!
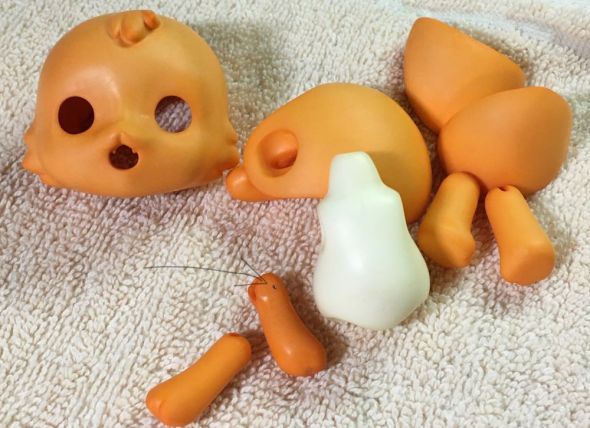
The white torso is the part that looked so terrible in the earlier photo so you can see how well the acetone removed the dye. The arrow shows where I inserted a metal pin to fix the acetone damage. You can see that the orange coloring is pretty consistent this time.
I reassemble Foxy with jewelry elastic and then gave her a body blush and faceup.
 I wanted to paint some kind of flowery decorations on her. I found these cute nail decals and they worked great. Easy too.
The sculpt didn’t really have a nose, so I glued on a Swarovski crystal.
I don’t think I have the nerves for dyeing BJDs. Many people get beautiful results but I don’t know of anyone who accepts dyeing commissions. I think it’s a labor of love.
Here is the finished Foxy.


I always enjoy when artists share pictures of their process. I hope you found something interesting or inspiring. Please feel free to share your BJD dyeing advice and experience.
All my project photos on Flickr! Link to open a new window.
My Etsy Shop! Link to open a new window.
Fun stuff on Pinterest! Link to open a new window.
Whatever is happening on Facebook! Link to open a new window.
